
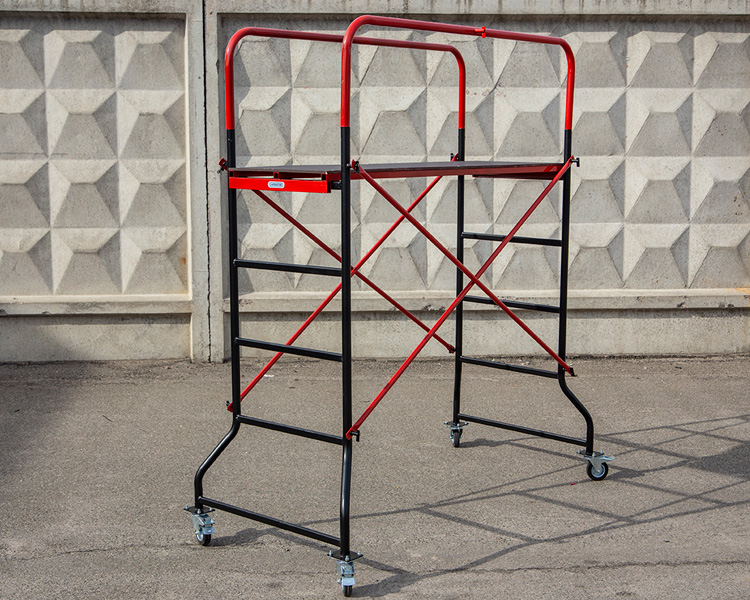
A scaffolding tower for interior work, repairs, and installations
10 May 2026

Construction scaffolding is a very useful thing for repairs or construction. No ladder, chair or stepladder will help you out as much as the simplest scaffolding can.
Yes, the advantages of scaffolding are obvious, but are they easy to assemble? If you are a craftsman working alone, should you buy scaffolding? If you are wondering in advance whether you can assemble the VIRASTAR MINI steel scaffolding yourself, perhaps our article will clarify the situation and give you confidence.
After unpacking the film, remove all the elements. If you choose a kit with wheels, attach the wheels with bolts and nuts to the base of the ladder. The wheels are special and have a foot brake to stop the movement of the scaffold.
If your model is a VIRASTAR MINI M2 or M3 scaffold, you need to increase the height using additional ladder frames. The length of the additional ladder frames is 90 cm. The difference between the frames for the M2 mini-scaffold is that they do not have flag locks. While M3 frames have side ladders with and without flag locks.
Additional stairs also need to be secured with diagonal ties.
The length of the ties on the scaffold M1, M2, M3 is different:
High scaffolds M3 are also strengthened with diagonal ties.
That's it - you've assembled the scaffolding, now you can safely get to work!
We wish you to do your job well, safely and quickly!
If you are interested in what other scaffolding we can offer, come here and choose!
You may also find the article “How to unfold an articulated ladder in different positions?” useful.

4 May 2026

14 April 2026